
Monday, December 26, 2016
Gear Review: Princeton Tec Vizz Headlamp

Thursday, December 22, 2016
Salomon S-Lab Fellcross 3
Gear Review: Salomon S-Lab Fellcross 3

If I had to pick *just one trail shoe* to run in, it would be this Salomon Fellcross. Its not everything, but it does everything well. Lightweight yet very well made, aggressive traction in an almost zero-drop shoe. The formula for speed and control. This is a fellcross shoe, meaning its designed for steep, soft, and wet hillsides (yes, sometimes rocky) of Europe.
So what's this fellcross shoe doing with me here in dry Colorado? For the most part, retailers here refuse to carry such a shoe. I've found that the deep aggressive lugs perform quite well on our Colorado scree (gravel), found here local and on most mountains. Important note: One needs to stay conscious that tall aggressive lugs pose a trip hazard when covering rocks and bounding over obstacles. This is far from your typical minimalist trail shoe.
With the fall of shoemaker Inov-8, Salomon (S-Lab) seems to be the only choice in a true technical-race trail shoe. The Salomon Fellcross 3 is now being offered under Salomon's lineup as the Salomon 'Speed' and 'Speed Pro'.
Salomon S-Lab Fellcross 3
$129 online retailers
Salomon S-Lab Speed
$100-179 online retailers

If I had to pick *just one trail shoe* to run in, it would be this Salomon Fellcross. Its not everything, but it does everything well. Lightweight yet very well made, aggressive traction in an almost zero-drop shoe. The formula for speed and control. This is a fellcross shoe, meaning its designed for steep, soft, and wet hillsides (yes, sometimes rocky) of Europe.
With the fall of shoemaker Inov-8, Salomon (S-Lab) seems to be the only choice in a true technical-race trail shoe. The Salomon Fellcross 3 is now being offered under Salomon's lineup as the Salomon 'Speed' and 'Speed Pro'.


Salomon S-Lab Fellcross 3
$129 online retailers
Salomon S-Lab Speed
$100-179 online retailers
My New Favorite Pants-Prana's Bronson Pant
Prana's Bronson Pant

Looking for pants this fall, I looked at a few from Prana. Prana's Bronson pant appeared to be a good but simple looking colored denim, suitable for the casual office and the brewery. Off the rack, the pant is uber soft, relatively light, with a comfortable cut. The soft and comfy feel comes in part from a 98/2 percent split of organic cotton and elastane (spandex). I had no idea at the time that I was wearing a stretch jean (technically this not a denim).

With the exception of pure synthetic hiking pants, I never hike in pants, jeans, etc. I found myself hiking in the Prana Bronson last week, and they were very comfortable. Unbeknownst to me during the hike, the Bronson pant features a full running inseam gusset, allowing for full mobility on the steep climbs and funky traverses.
The one immediate hit on the pants is the 5th pocket on side. Its opening is too small for a phone yet too big for a knife. Seems to be there for style only. Triple stitching and double rear belt loops are very much appreciated details.
Comfortable, well made, and priced right.
Prana Bronson Pant for men, $75.
Tuesday, October 28, 2014
Gear Review: Asolo Fugitive GTX Hiking Boot
When someone mentions hiking or backpacking, I have to think most of us think hiking boots. While you may not be familiar with the name, the Asolo Fugitive GTX is a boot that you have probably seen somewhere already.

This boot takes some hits from hardcore critics for its flashy good looks and for not being a "real mountaineering" boot. Well, no such words from me thus far. The boot is not marketed as a mountaineering boot and is not crampon ready. This boot breaks in crazy fast and I've found it to be uber comfortable within 24 hours out of the box. Great boots including this one, are made in Europe. Initial inspection of materials and craftsmanship are all top notch here. The heel to toe drop is lower than the usual hiking boot, especially for one in this more rigid class. Most will find this profile more comfortable. This boot is ideal for medium volume feet and is setup to accommodate several lacing options. Ive been wearing a Scapra boot for many years, so in comparison the Asolo Fugitive does not have the precise technical feel.
The Fugitive does not have the almost-to-toe lacing but has a large and very comfortable toe box. The toe box allows the toes to spread, relieving pressure under the ball of the foot, and reduces overall foot fatigue.

An extended test under a variety of conditions proved the materials and craftsmanship in the Fugitive to be top shelf. The fugitive is best placed for heavy hiking and backpacking where a more technical boot is not needed. I'd like to see a more aggressive outsole with namebrand rubber to match the very well built boot upper.
This Asolo Fugitve GTX is a very smart buy in the company of $200 hiking boots.

Gear Review:
Inov-8 Roclite 245 Trail Runner
Invov-8’s shoe line was born from Europe’s fell running.
Running off road and off trail in rugged terrain consisting of deep grass, mud,
and rocks. For many years this shoe line was known only by a small number of
trail runners and racers. Inov-8 had a
unique niche with low-profile lightweight yet very rugged and aggressive race-ready shoes. An
example of this is found in a review of mine on the Inov-8 Flyrock.


Today, Inov-8s are seen mostly indoors at gyms and cross-fit
locations with their F series training/cross-fit shoes. Unfortunately the
company has shifted its direction away from building solid trail shoes. At the
same time, almost all other manufactures have flooded the market with low
profile trail shoes.
The Inov-8 Roclite 245 is easily the worst piece of footwear
I have ever worn. This from a once hardcore Inov-8 fan. This shoe has
absolutely nothing in common with the previous Roclite shoe series. Design or
materials. This is really a slipper, not a shoe. The shoe upper is entirely of
light mesh with the overlays being aesthetic only, offering no stability. The
sole consists of a single piece of rubber with no midsole. A sloppy tongue, bad
lacing, and a poorly made toe rand made this shoe of no use to me. You may find
that the winner of the 2014 Pikes Peak Ascent ran to victory in this shoe…but it’s
a fact that seems to have no real weight.
This is a terrible terrible shoe at any price point. Inov-8
should be ashamed.
Tuesday, January 28, 2014
Gear Review: Suunto Core Wrist Watch
Let’s be honest gents, a wrist watch is more an item of
jewelry these days than a functional timepiece as it once was. We have the time
and so much more on our phones, computing devices, and in our car. You may
think your black clad military looking watch sets you apart from the stainless
Rolex dive watches, but it doesn’t. Yep, still jewelry.

Featured here is the Suunto Core Classic. Entirely black,
plastic moving bezel, and elastomer wrist strap. The only noteworthy
improvement over the years with the Core Classic, is the switch from a painted
metal bezel to a plastic one. I have to think the metal bezel will hold up
better under abuse, but the black plastic holds its good looks over time.
Remember, with watches it’s all about presentation and perception. Jewelry.
For me, the Suunto Core’s simple looks make its operation
both visually and instinctively pleasant to use. Toggling through modes such as
compass, altimeter, and time options, with a touch of button. Entering a menu
tree with a simple long press of the same button. On screen ques make button
and option selections idiot proof. The Core’s chassis and face is relatively
low profile and combined with a well thought wrist strap, fits and stays put. A
nice touch, the wrist strap keeper fits positively into the wrist strap,
preventing movement readjustment and tinkering.
As cool as the black on black scheme looks, it makes reading
the watch more difficult than I anticipated. I expected a better contrast
adjustment. I was hoping for more brightness and contrast after replacing the
battery, no love. Using the watch here in Colorado, the altimeter is the
biggest disappointment. With Colorado’s ever-changing weather, the barometric
based altimeter is consistently off by thousands of feet. There is an option to
plug in altitude reference points during each new adventure, but I’m not that
geeked-up.
All in all this is a well-made watch and priced
appropriately. The Core series lacks real ruggedness and for that it belongs in
town and not in the field. Suunto however does make it’s Vector series, a
rugged multi-function watch which will hold up to some abuse on any adventure.


Suunto Core
$299
Sunnto Vector
$199
Wednesday, January 8, 2014
Stupid Gear Award:
Lock-back Safety Knives (LBS)

STUPID: A lock-back mechanism prevents the knife from *closing*,
not opening. It assures you that the knife blade won’t close on your fingers
while using it…in the event that there is pressure put on the back of the
blade. I can’t think of any scenario where there is pressure on the back of
blade, but regardless the lock-back secures the blade and makes it rigid during
extreme uses.
A lock-back mechanism prevents the knife from *closing*,
not opening. It assures you that the knife blade won’t close on your fingers
while using it…in the event that there is pressure put on the back of the
blade. I can’t think of any scenario where there is pressure on the back of
blade, but regardless the lock-back secures the blade and makes it rigid during
extreme uses.
Lock-back Safety Knives (LBS)
This is currently my favorite overall design/idea to pick
on, the lock-back safety, or ‘LBS’. Where did the idea spawn from? Is there a
rash of knife lock-back failures?! I have to think this is a gimmick to sell
knives to the not-so-knife-like folk. What a terrible feature and design. Most
people, especially those unfamiliar with knives, have a hard enough time
working the normal lock-back, let alone a second mechanism simultaneously.


Most of us have a knife for one use or more. Basic utility,
camping, hunting, even personal defense. Hopefully you’ve chosen a name brand
knife, feel confident using it, and keep it clean and sharp. If you have a single
blade folding knife, it most likely has a locking blade. Meaning you have to
push a spring in some way to close it, once opened fully. Most newer knives
have gone to a breach style side to side lock, verse the rear button lock.
Jump back for a moment. For myself and other Mid-westerners like me, there’s a tradition of a father or grandfather passing down a pocket
knife, your first knife. Possibly a Case, Buck, or Swiss Army knife. Due to the
age, this pocket knife typically had more than one blade and had no lock-back
feature. As it was passed down, you were given brief instructions on using the
knife, whittling, always cutting away from yourself, etc. A kid’s second knife
was a step up, bigger, and more up to date, having a locking blade for more
confident and versatile use (cutting, skinning, stabbing).

Insert present day folding knives. Assuming you've spent
more than $20, you have a reasonable knife with a locking blade and material such
as 440 Stainless steel. The knife has one of the two styles of locking
mechanisms mentioned and possibly even a lock-back safety. Any knife in this “reasonable”
category has more than a sufficient lock mechanism and one that has been
torture tested by the manufacturer.
STUPID:
 A lock-back mechanism prevents the knife from *closing*,
not opening. It assures you that the knife blade won’t close on your fingers
while using it…in the event that there is pressure put on the back of the
blade. I can’t think of any scenario where there is pressure on the back of
blade, but regardless the lock-back secures the blade and makes it rigid during
extreme uses.
A lock-back mechanism prevents the knife from *closing*,
not opening. It assures you that the knife blade won’t close on your fingers
while using it…in the event that there is pressure put on the back of the
blade. I can’t think of any scenario where there is pressure on the back of
blade, but regardless the lock-back secures the blade and makes it rigid during
extreme uses.
The LBS. Engineering a safety mechanism on top of an already
existing and proven safety is mind boggling. Worse, this new safety design doesn’t
do what’s actually needed…that is, keeping the knife from *opening*! Our
knives are found everywhere, rattling in a glove box, junk drawer, in a backpack,
on a climbing harness, etc. For me, on several occasions, I have reached for my
knife and found that it was opened halfway while being jostled or collided
with. Folding knives overall are prone to opening by design, not closing. This
new LBS design doesn't address this condition at all. #AssBackwards
Monday, December 16, 2013


The shoe construction is well done with attention to detail and the use of good materials. The large lugs of the sole did very well on the trail in the snow but present quite the trip hazard for normal running conditions. Runners with low to medium volume feet will have the best fit while the use is most suited for soft and wet trails, with steep inclines and descents. I did enjoy the SpeedCross as a lightweight hiking shoe with its ant-debri mesh and water resistant textiles. The shoe offers a great amount of underfoot protection and traction without any noticeable weight or stiffness.
Salomon SpeedCross 3
313 grams
$145
Thursday, February 16, 2012
Gear Review: Tech4o
Discover GPS

Fitness watches today could accurately be referred to as wrist-top computers. The secret agent watches of yesterday with steel-cutting lasers and micro-fine cable rappel lines seem pale in comparison. Manufactures push the limits cramming the latest functionality and technology into the smallest package. These “watches” provide the user with data such as time, distance, pace, direction, and caloric expenditure. Fitness watches use an accelerometer or GPS communication to track pace and distance. GPS watches require no tuning or adjustment relative to accelerometer watches and prove to be more accurate over rugged terrain.
 Enter
the Discover GPS watch by Tech4o. The Discover GPS comes onto the market packed
with features and priced well under comparable units. I initially judge these
watches by size, battery life, and the technology used. The Discover GPS is
lighter than other models tested and I found its size and shape to be superior.
The watch features a rechargeable lithium battery which lasted several days on
a single charge during normal use. The battery is more than ample to power all
features even on the longest runs. A power saver mode can be enabled to get the
most from the battery while on longer expeditions such as extended hikes,
cycling, and alike. The people from Tech4o have somehow hidden the GPS receiver
in the Discover GPS to produce a watch that is no larger than the standard
G-Shock, while providing solid GPS reception.
Enter
the Discover GPS watch by Tech4o. The Discover GPS comes onto the market packed
with features and priced well under comparable units. I initially judge these
watches by size, battery life, and the technology used. The Discover GPS is
lighter than other models tested and I found its size and shape to be superior.
The watch features a rechargeable lithium battery which lasted several days on
a single charge during normal use. The battery is more than ample to power all
features even on the longest runs. A power saver mode can be enabled to get the
most from the battery while on longer expeditions such as extended hikes,
cycling, and alike. The people from Tech4o have somehow hidden the GPS receiver
in the Discover GPS to produce a watch that is no larger than the standard
G-Shock, while providing solid GPS reception.
The
Discover GPS is feature rich, light, and easy to use. This model will serve a
number of sports and with no other accessories needed to purchase. The Discover
GPS package and price point makes this a great value.
Price:
$199.99
Gear Review: Klymit
Kinetic Double Diamond Vest
Klymit has developed an inflatable and adjustable vest aimed
and maximizing performance and compactness. The design takes advantage of
stretch fabric, argon gas, and a built-in regulator dial.

The vest collar is not insulated, but the cut and fit of the collar, arms, a waist seemed ideal for heat retention. Drawstrings compliment both the collar and waist for adjustable fit. The vest design hugs the body, and I was very impressed with the warmth. The vest performed well for me while being in a low aerobic zone near freezing temperatures wearing a long sleeve base layer.
Inflation, and hence heat retention, is adjusted by the use of a regulator dial on the left side of the chest. Truthfully, I learned that unzipping and zipping to regulate body temp is almost instinctive to me at this point, and I found I did not take advantage of vests regulator dial as often as I would like. However, since the vests chambers must be air tight, the relative breathability found on other traditional down and synthetic vests is in question with this item. I do not feel that this vest will breath well enough during more increased aerobic activities.
The vests inflation hose is retained in its own zipped area within the left hand pocket, keeping it out the way until inflation time. I found the vest easy to inflate and deflate with the included “Klymitizer” and tanks. I found no clear indication on the vest or in the enclosed documentation as to what maximum inflation looks like. Left mostly untouched, the vest lost the majority of its loft and required another fill in 3-4 days. It’s unclear at this time if this is due to a leak or just normal loss of gas.
In the end, I can’t see myself taking advantage of the adjustability that Klymit has built into this vest. Deflating the vest and recharging later on the mountain just doesn’t appeal to me. The Klymit vest when combined with one tank and charger, seems to diminish most if any weight and or storage savings. Keep at it team Klymit! In the meantime, I’ll continue with the traditional layering and venting techniques.
Monday, January 23, 2012
Trip Report: Colorado Hut Trip, December 2011

My first Colorado hut trip was just last month. Pathetic, as I've lived in this great state for the better part of two decades. I assumed what most others have; that hut reservations have to be made a year in advance and are otherwise difficult. My trip was conceived and planned last minute and I was able to book a very nice “hut” just two days before my visit.
 These so-called huts are really a mix of back country cabin,
log home, and ski lodge. Most include furnished kitchens, wood burning and
propane stoves, solar powered lighting, and a wide open floor plan. Other
privately owned huts rented through the 10th Mountain Division,
feature backcountry luxury amenities such as saunas and hot showers. The method
by which you access a hut varies by season. Most will ski, hike, or snowshoe.
Snowmobiles and ATVs are allowed on some routes but I think it’s fair to assume
that most of us are looking for a motor-free retreat.
These so-called huts are really a mix of back country cabin,
log home, and ski lodge. Most include furnished kitchens, wood burning and
propane stoves, solar powered lighting, and a wide open floor plan. Other
privately owned huts rented through the 10th Mountain Division,
feature backcountry luxury amenities such as saunas and hot showers. The method
by which you access a hut varies by season. Most will ski, hike, or snowshoe.
Snowmobiles and ATVs are allowed on some routes but I think it’s fair to assume
that most of us are looking for a motor-free retreat.
 I chose the Crane Park trail-head as our starting point. This
route is comprised mostly of rolling single track through a mix of dense pine.
The trail opens in the last mile with a steady uphill grade and great panoramic
views. From trailhead parking to the 10th Mountain Hut was just less
than four and a half miles. The trail was broke for us already thanks to skiers
pulling sleds the previous day. We made it to the hut in less than four hours,
taking a few short stops to check navigation. From this route, the hut is not
visible until you’re within 100 meters. The trails into the 10th
Mountain Huts are marked with blue diamonds, but with other huts in the area,
use caution at trail intersections, checking your direction.
I chose the Crane Park trail-head as our starting point. This
route is comprised mostly of rolling single track through a mix of dense pine.
The trail opens in the last mile with a steady uphill grade and great panoramic
views. From trailhead parking to the 10th Mountain Hut was just less
than four and a half miles. The trail was broke for us already thanks to skiers
pulling sleds the previous day. We made it to the hut in less than four hours,
taking a few short stops to check navigation. From this route, the hut is not
visible until you’re within 100 meters. The trails into the 10th
Mountain Huts are marked with blue diamonds, but with other huts in the area,
use caution at trail intersections, checking your direction.
 This hut, like so many others, has a main level that
features 180 degrees of large windows to enjoy the surrounding meadows and mountain
ranges. There is more than enough space and seating for relaxing, eating, etc.
The kitchen was large enough for several to use at once and all the cooking essentials
such as plates, pots, and utensils, are provided. Water is available at the
cabin via a tank fed by the huts roof run-off.
Melting snow on one of the stoves is the most common for drinking water.
I would recommend filtering either source.
This hut, like so many others, has a main level that
features 180 degrees of large windows to enjoy the surrounding meadows and mountain
ranges. There is more than enough space and seating for relaxing, eating, etc.
The kitchen was large enough for several to use at once and all the cooking essentials
such as plates, pots, and utensils, are provided. Water is available at the
cabin via a tank fed by the huts roof run-off.
Melting snow on one of the stoves is the most common for drinking water.
I would recommend filtering either source.
 The 10th Mountain Division Hut is suited for many
skill levels, is family friendly, and is in great condition. Trails, lakes, and
peaks in the immediate area, offer a great variety of activities. Be sure to
check Huts.org for a recommended trip checklist. Go prepared and have fun!
The 10th Mountain Division Hut is suited for many
skill levels, is family friendly, and is in great condition. Trails, lakes, and
peaks in the immediate area, offer a great variety of activities. Be sure to
check Huts.org for a recommended trip checklist. Go prepared and have fun!

My first Colorado hut trip was just last month. Pathetic, as I've lived in this great state for the better part of two decades. I assumed what most others have; that hut reservations have to be made a year in advance and are otherwise difficult. My trip was conceived and planned last minute and I was able to book a very nice “hut” just two days before my visit.
Hut descriptions and current vacancy can be viewed online with
an actual phone call needed to make payment. It was easy to get through to the
staff at the 10th Mountain Division office and they were very
friendly and helpful. The office emailed
my confirmation and itinerary within moments of payment.
 These so-called huts are really a mix of back country cabin,
log home, and ski lodge. Most include furnished kitchens, wood burning and
propane stoves, solar powered lighting, and a wide open floor plan. Other
privately owned huts rented through the 10th Mountain Division,
feature backcountry luxury amenities such as saunas and hot showers. The method
by which you access a hut varies by season. Most will ski, hike, or snowshoe.
Snowmobiles and ATVs are allowed on some routes but I think it’s fair to assume
that most of us are looking for a motor-free retreat.
These so-called huts are really a mix of back country cabin,
log home, and ski lodge. Most include furnished kitchens, wood burning and
propane stoves, solar powered lighting, and a wide open floor plan. Other
privately owned huts rented through the 10th Mountain Division,
feature backcountry luxury amenities such as saunas and hot showers. The method
by which you access a hut varies by season. Most will ski, hike, or snowshoe.
Snowmobiles and ATVs are allowed on some routes but I think it’s fair to assume
that most of us are looking for a motor-free retreat.
This being my first hut approach and not familiar with any
of the trails, I picked an easy to moderate hut trip. There’s one hut in the 10th
Mountain system appropriately named “The 10th Mountain Division Hut”.
It sits about 6 miles due west of Ski Cooper. There are two access routes from
the east, varying from 4 miles to 6 miles. Elevation gain from either is around
1,000 feet. This hut like most others
has additional access routes from other huts in the system.
 I chose the Crane Park trail-head as our starting point. This
route is comprised mostly of rolling single track through a mix of dense pine.
The trail opens in the last mile with a steady uphill grade and great panoramic
views. From trailhead parking to the 10th Mountain Hut was just less
than four and a half miles. The trail was broke for us already thanks to skiers
pulling sleds the previous day. We made it to the hut in less than four hours,
taking a few short stops to check navigation. From this route, the hut is not
visible until you’re within 100 meters. The trails into the 10th
Mountain Huts are marked with blue diamonds, but with other huts in the area,
use caution at trail intersections, checking your direction.
I chose the Crane Park trail-head as our starting point. This
route is comprised mostly of rolling single track through a mix of dense pine.
The trail opens in the last mile with a steady uphill grade and great panoramic
views. From trailhead parking to the 10th Mountain Hut was just less
than four and a half miles. The trail was broke for us already thanks to skiers
pulling sleds the previous day. We made it to the hut in less than four hours,
taking a few short stops to check navigation. From this route, the hut is not
visible until you’re within 100 meters. The trails into the 10th
Mountain Huts are marked with blue diamonds, but with other huts in the area,
use caution at trail intersections, checking your direction. This hut, like so many others, has a main level that
features 180 degrees of large windows to enjoy the surrounding meadows and mountain
ranges. There is more than enough space and seating for relaxing, eating, etc.
The kitchen was large enough for several to use at once and all the cooking essentials
such as plates, pots, and utensils, are provided. Water is available at the
cabin via a tank fed by the huts roof run-off.
Melting snow on one of the stoves is the most common for drinking water.
I would recommend filtering either source.
This hut, like so many others, has a main level that
features 180 degrees of large windows to enjoy the surrounding meadows and mountain
ranges. There is more than enough space and seating for relaxing, eating, etc.
The kitchen was large enough for several to use at once and all the cooking essentials
such as plates, pots, and utensils, are provided. Water is available at the
cabin via a tank fed by the huts roof run-off.
Melting snow on one of the stoves is the most common for drinking water.
I would recommend filtering either source.
Two large wood burning stoves provided more than enough warmth
during our December stay and an ample wood supply is provided for you. This hut
also featured a cold storage closet for keeping perishables overnight. This hut
has all of the sleeping capacity on the second level so there is no issue with
a late night card game interfering with other guest’s sleep.
 The 10th Mountain Division Hut is suited for many
skill levels, is family friendly, and is in great condition. Trails, lakes, and
peaks in the immediate area, offer a great variety of activities. Be sure to
check Huts.org for a recommended trip checklist. Go prepared and have fun!
The 10th Mountain Division Hut is suited for many
skill levels, is family friendly, and is in great condition. Trails, lakes, and
peaks in the immediate area, offer a great variety of activities. Be sure to
check Huts.org for a recommended trip checklist. Go prepared and have fun!Friday, January 20, 2012
Gear Review: Inov-8 Flyroc 310


Most of us at one point shopped for athletic footwear purely based on how they looked in the store. What looked cool. As we learned more about our feet and our activity, we looked for a shoe or a boot that matched properly. Looks are what first attracted me to the Inov-8 ‘Flyroc 310’ a couple of years ago. The shoe screamed adventure with an aggressive sole and its unique webbing and lacing system. Inov-8’s line of shoes looks like nothing else on the market. A sharp contrast from the typical beefy trail shoe, the Inov-8 line promotes natural foot movement with a minimal yet advanced sole design. It’s this design that actually kept me from purchasing the shoe until now. I knew that I needed to build my foot and leg strength before running in such a shoe. I was accustomed to stomping around in something much more substantial.
The Inov-8 product line rests on top of 8 different outsoles, each with its own intended activity and terrain condition. The Flyroc model and its sole sits about in the middle of extremes between hard compact dirt and mud and snow. Its intended crowd is trail runners and adventure racers. Note, Inov-8 designates other models specifically for “mountain running”.
The Flyroc felt great right out of the box. The shoe’s upper is comprised completely of webbing reinforced with lacing support around the foot. The fit is snug and very comfortable. Once on the trail, I noticed something I didn’t in the store, the shoe’s sole has a bubble-like knuckle that sits just behind the ball of the foot, between the big and middle toe (head of the metatarsal I’m told). I found this to add significant comfort while ascending and descending on hard pack and rocky terrain. This feature also promoted the spreading of the toes and gave me a barefoot like experience. After 15 minutes on the trail, it was if I didn’t have shoes on at all…like I had rubber claws glued directly to my feet. The combination of the flexible sole and outer lugs provided great traction on loose dirt/scree, rock and snow. The ankle channel of this shoe is cut very low so I wouldn’t recommend a low-cut (“no-show”) sock. I found that I picked up more than my fair share of pebbles. Surprisingly, I had no issues with wet feet while running in a light mix of snow and slush. The Flyroc is also available in Gore-Tex.
With its semi sticky rubber sole, well-made upper webbing, and good toe protection, the Flyroc makes for a lightweight all-around adventure shoe. The shoe is light, well made, well-engineered, and priced at or below other trail shoes.
Weight: 1lb 4 oz (mens size 9)
MSRP: $90
Thursday, January 19, 2012
Gear Review: Source Crosser Sandal:

When I learned that I’d be testing sandals designed and manufactured in Israel, my immediate thought was “can I be objective?”. As a gear junkie and former leatherneck, I’ve learned to appreciate everything from boots to machine guns coming out of Israel. Simple yet intelligent designs that are overbuilt to take whatever you throw at it.
 The Source ‘Crosser’ sandal from Vagabond Systems did not
disappoint. In hand, I immediately noticed that the soles were much more
substantial than other sport sandals. The high quality rubber had me jonesing
to try these out on some rock slab. The Crosser is designed for river crossing
but the outer sole has traction cross sections at the ball and heel of the foot
to support other activities. The sandals were very comfortable on sand, rock,
and out on the town. Source’s ‘Onestrap’ system uses a single piece of strap
that moves freely through the foot-bed and adjusts using one piece of hardware.
Genius.
The Source ‘Crosser’ sandal from Vagabond Systems did not
disappoint. In hand, I immediately noticed that the soles were much more
substantial than other sport sandals. The high quality rubber had me jonesing
to try these out on some rock slab. The Crosser is designed for river crossing
but the outer sole has traction cross sections at the ball and heel of the foot
to support other activities. The sandals were very comfortable on sand, rock,
and out on the town. Source’s ‘Onestrap’ system uses a single piece of strap
that moves freely through the foot-bed and adjusts using one piece of hardware.
Genius.
The fit was true to size and the feel is sturdy and stable,
leaving the underfoot protected. Stability is enhanced using Source’s ‘A.R.T.
(Advanced Rubber Technology) Grip’ rubber footbed with hundreds of micro points
that holds the foot even wet. While the sandal’s strapping will not support
ascending and descending rugged trail for most (not what it was designed for),
it provided all the protection and comfort of a high-end hiking boot sole, the
relief of a sandal, and the utility of a water shoe. Very well done.
MSRP: $90
Weight: 615 grams
Gear Review: Siskiyou
Convertible Pant
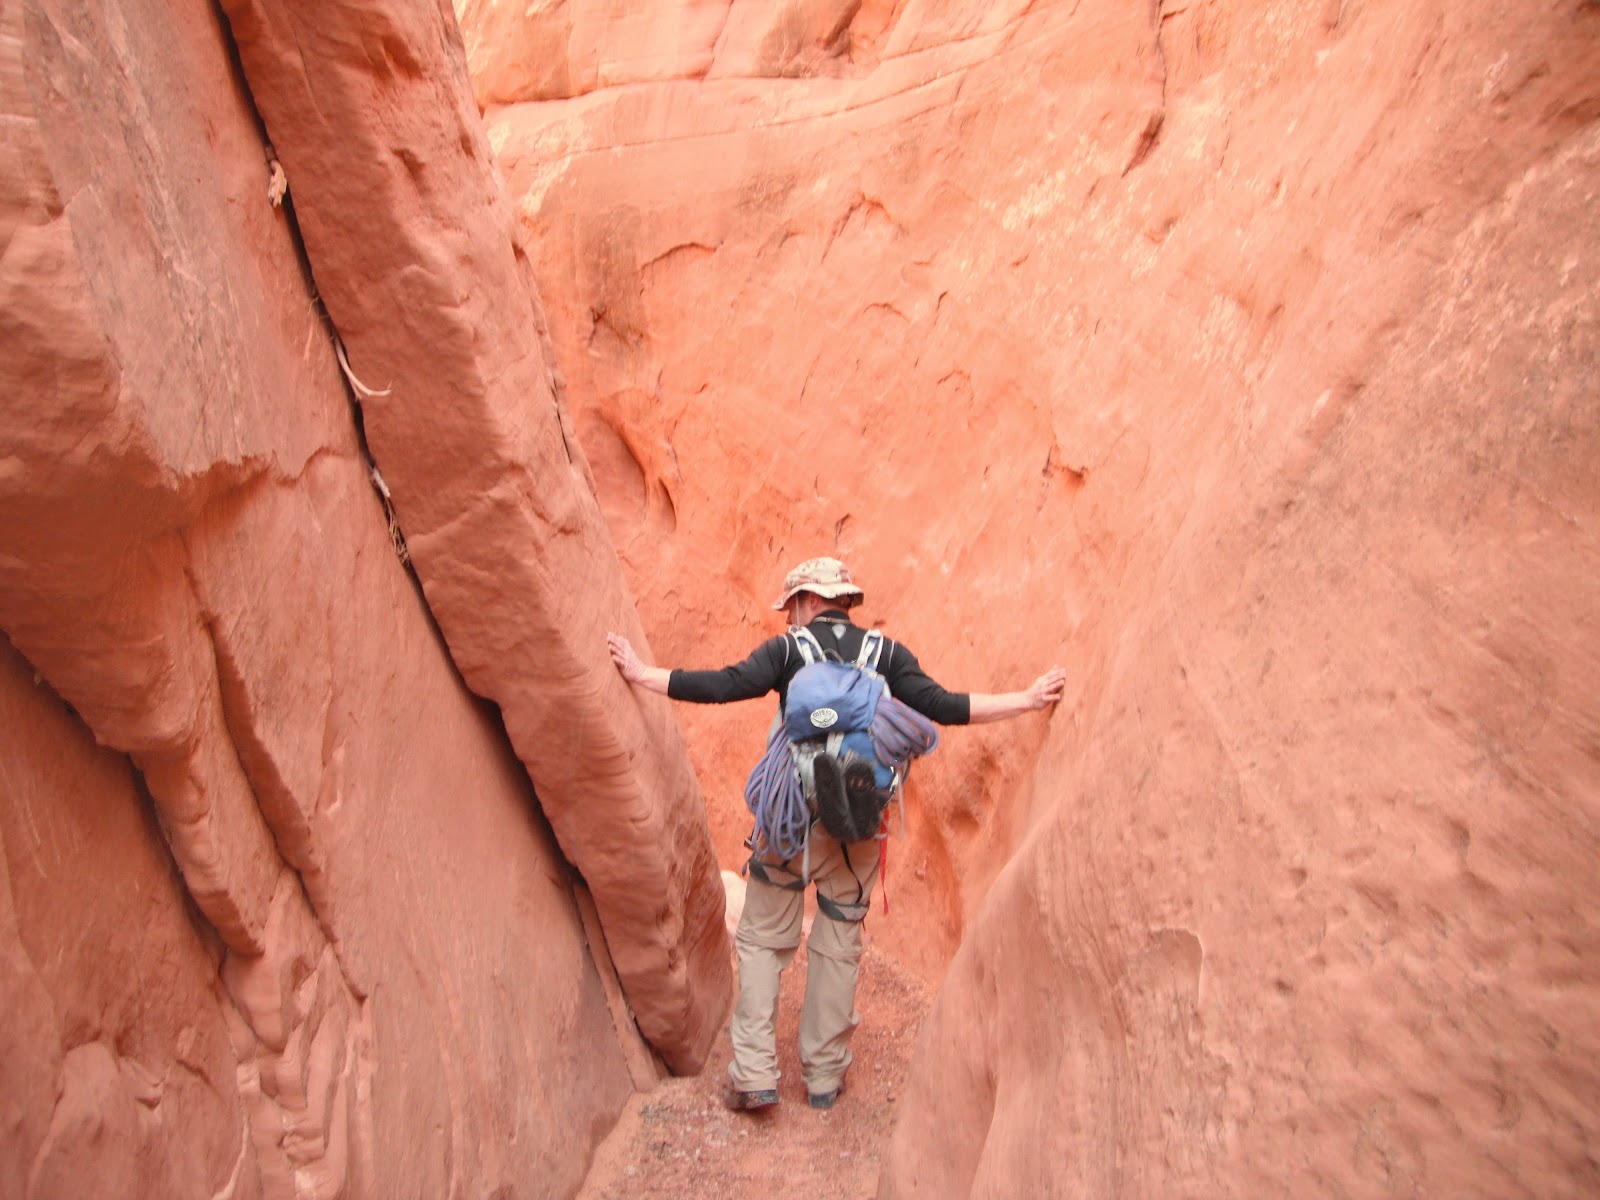
I've spent the last four plus
years moving toward a ultralight hiker, and with that, I expect more out of my
gear. Case in point, the Siskiyou convertible hiking pants from GoLite. This is
an ultralight pant weighing in at 9 ounces, but featuring front and rear
pockets and one side cargo pocket. The pants have ankle zips for ease of
removal and zip off converting to 11” shorts. For this pant and other clothing,
GoLite has morphed 100% Nylon content into a proprietary material they call
‘Suplex’. The result for me was a Nylon that felt more like ultra-thin cotton,
breathed extremely well, and is water resistant.
 I purchased the pants just
before my Utah trip last week and they got quite the workout. What I didn’t
have planned for the pants was a rough half day of rappelling, climbing, and
sliding down a mix of rock canyons. At the days end, I was nothing short of
amazed how well these pants held up. The smooth fabric and lack of exposed
stitching around pockets kept the pants from snagging. The articulated knees
worked very well when climbing. These pants are very packable, look almost good
enough for the office, and are well suited for all-day adventure/travel.
I purchased the pants just
before my Utah trip last week and they got quite the workout. What I didn’t
have planned for the pants was a rough half day of rappelling, climbing, and
sliding down a mix of rock canyons. At the days end, I was nothing short of
amazed how well these pants held up. The smooth fabric and lack of exposed
stitching around pockets kept the pants from snagging. The articulated knees
worked very well when climbing. These pants are very packable, look almost good
enough for the office, and are well suited for all-day adventure/travel.
MSRP $90
(paid $50 at GoLite sale)
Size: Small to XL
Gear Review: Mountain Hardwear ‘Pinole
20’ Sleeping Bag

Mountain Hardwear’s ‘Pinole 20’ sleeping bag is a price
point bag aimed at those that just don’t want to spend more than $100 on a bag.
This is a comfort mummy cut bag that’s efficient yet roomy enough for twitchy
sleepers like myself. The bag weighs in at just over a very reasonable three
pounds and features MH’s synthetic ‘Themic MX’ insulation. For me, the bag
seemed very comfortable approaching freezing temps while wearing a light
baselayer. MH has the bag’s EN comfort rating posted at 35 degrees and it
packed down to about 8” when using a compression sack. The bag packs value with
a face gasket, tailored hood, and fleece lined stuff sack that doubles as a
pillow. The bag uses a well sized zipper but I found that the bag’s shell and
lining repeatedly interfered with zipping. Note, the best insulation isn’t much
good without a great running zipper so test the zipping passionately in the
store before you buy any bag. While it’s aimed at lighter duty, the bag is a
good fit for the occasional overnighter in moderate temperatures.
MSRP: $90
Size: Regular and Long
Weight: 3 lbs. 3 oz.
Gear Review-Petzl eLite
 I like the idea that some items never really leave my
backpack. My survival staples live at the very bottom of my pack and are only
seen on the occasional inventory. Such items as an emergency blanket, survival
kit, and first aid pouch. These days, you’ll never find me without a headlamp,
regardless what’s planned for the day. On more than one occasion a morning to
afternoon hike has turned into a late evening descent.
I like the idea that some items never really leave my
backpack. My survival staples live at the very bottom of my pack and are only
seen on the occasional inventory. Such items as an emergency blanket, survival
kit, and first aid pouch. These days, you’ll never find me without a headlamp,
regardless what’s planned for the day. On more than one occasion a morning to
afternoon hike has turned into a late evening descent.
Insert the Petzl eLite. A small lightweight
emergency headlamp, the eLite comes in a reusable hard case and a
battery with a ten year shelf life. Some eLite features include two
white lighting levels, one red, and two flash modes for signaling.
It’s rare that you enjoy spending money on gear that you
think will never get used, and I was sure this piece would never see the light
of day. It wasn’t long before a hiking partner’s headlamp failed on a dark Barr
trail descent, and out came the eLite. I was instantly impressed how
bright and brilliant the light output was. I also found the dial-type switch
easy to operate even with gloves on. The light swivels from the headband using
a ball joint, making for easy adjustment. Surprisingly, the light stayed
wherever you pointed it, even when trail running with it later. The eLite
performed great while running, especially in conditions where you needed to be
seen versus seeing.
After almost a year later and at 28 grams, I’m amazed that
something so lightweight has held up to so much repetitive use. The light runs
on two Lithium CR2032 batteries (included) which
may prevent most of us from using it daily. I prefer to use something
rechargeable and in my use, I got about 10 hours of total battery life. The
light is also waterproof, includes a whistle, and is made to operate in extreme
temperatures (-22 °F to +140 °F).
This is the fourth headlamp in
my collection and easily my favorite with the overall usability and
performance. At under $30, the Petzl eLite provides piece of mind
that you or your hiking partner will make it down safely in low light conditions.
A new ‘must have’ item for adventurers.
Gear Review: Therm-A-Rest Z Lite Mattress

For just a few dollars more than the price of the standard
foam bed roll, the Thermarest Z-lite is a significant upgrade. I found
the Z-Lite to be as versatile as it was comfortable. The flat accordion design
was easy to pack and easy to deploy. The folding sections allow you to
customize the length from a camp seat to a camp bed. The Z-Lite uses a new
proprietary closed-cell foam that is softer on the top and denser on the
bottom. The result is a near memory foam feel that is durable enough to enjoy
on any terrain. The Z-Lite’s softer foam conformed much better with rough
ground relative to a standard foam pad, and the egg-crate design was more
stable for sleeping and with less pressure points. This mattress is made in the
USA and it’s a great fit for adventure racers and ultra-light hikers that want
to do more with less.
Size Small
MSRP $29.95
Weight 10oz.
Size Regular
MSRP $39.95
Weight 14 oz.
Gear Review: Garmin Dakota 20 GPS

Garmin packs a lot of utility into a small, lightweight, and
rugged package with their Dakota 20 GPS. This unit has multiple personalities
and performed very well as a hiking companion, a personal fitness trainer, and
an in-car navigation tool. These personalities or profiles, are customizable
and easily accessed via the touchscreen menu. The Dakota’s TFT display was
crazy easy to read in direct sunlight and it had great real-world battery life
making it my favorite on the trail. The unit’s small shape, wireless
capabilities, and fitness log, made for an all-inclusive bicycle computer when
paired with the available heart rate monitor. While the Dakota won’t take the
place of your in-car navigation system, it worked well navigating the streets while
in automotive mode, especially when paired with additional street maps.
The Dakota runs on two AA batteries and is waterproof,
meeting the IPX7 standard. The unit has 850 MB of built-in memory which is
expandable via a microSD slot. Navigation is enhanced with an electronic 3-axis
compass and barometric altimeter. The Dakota’s wireless capability enables it
to perform unit to unit transfers with similar devices. Activity logs such as
distance, elevation gain, and speed, can viewed and graphed on the unit or on
‘Garmin Connect’, Garmin’s online community.
The Dakota 20 prevailed as an easy to carry, value priced,
and full featured GPS. Some words of caution: The current generation of GPS
touchscreens are prone to scratches so I would recommend some screen
protection. The wireless range of this device is extremely limited, requiring a
handlebar mount while cycling (versus jersey rear cargo pocket) when paired
with the heart rate monitor.
MSRP: $349
Weight: 5.25 oz. with batteries
Size: 2.2 x 3.9 x 1.3” (WxHxD)
Trip Report: Bluejohn Blunder?: Bluejohn Canyon Trip Report, April 2011
Descending into the main fork of Bluejohn Canyon last Thursday brought on an overwhelming sense of bitter irony. I planned the trip and the route, so how is it that less than two hours into an all-day trek, my gut aches with unpreparedness. After all, it’s Aron Ralston and the movie 127 Hours that made this area so attractive. How after watching this movie several times and noting the mistakes made, can someone make similar blunders?
For me, I completely underestimated the south approach into the main fork. It was much more technical and deeper than I imagined. Coming out of the canyon the way we came in quickly seemed just short of impossible, and this was our “Easy alternate route”. Identifying and navigating routes through this unfamiliar area would also prove more challenging than expected. Most importantly, one has to completely understand and respect how remote of an area this is. It’s not exactly BFE but you’re 40 miles from pavement and well over an hour to the nearest town, where this is no hospital. There is no cell phone reception in this area, in the canyon or above. There is a ranger station south of the area, but I have to think that finding someone in a pinch isn’t going to happen.
For this particular area, I’m thinking 3 three things: Hydration, First Aid, and Navigation. My hiking partner and I were light in all three areas. We had minimal fluids as one liter got lost on a rappel, one small first aid kit between the two of us, and a GPS (the maps got left in the truck). Looking back, my partner didn’t know where I stowed my first aid in my pack and wasn’t familiar with using GPS.
All and all, we had a great day…but something like a broken ankle or a fall in the canyon could quickly turn fatal in an area that provides no relief and support.
Stay safe and go prepared!
Gear Review: Mountain Hardwear-Men's Butter Man Colorblock Hoody

Dressing just right for aerobic outdoor pursuits here in
Colorado can be challenging at times. Quite often you’re wearing too much or
too little and conditions may change during your activity. The Men’s ‘Butter
Man Hoody’ from Mountain Hardwear hits the sweet spot with a strategic
combination of warmth and ventilation. This is a lightweight half-zip pullover
that features thumb loops and a snug hood, making it well suited for a range of
temperatures and activities. With the use of Mountain Hardwear’s ‘Better
Butter’ fabric and a snug athletic fit, the hoody feels like an ultra-soft
second skin. I found it to breath, wick, and dry extremely well, and it
provided surprisingly good wind protection for how thin it is. This hoody is versatile
as a layer under a light jacket, over a compression t-shirt, or on its own. The
hood was unnoticeable while running and the neck zips up high offering extra
warmth while being very comfortable. The hoody has reflective accents on the
front and sides. I did find the thumb wholes to be cut a tad too high in the
sleeve for the average arm length but all in all, it’s easily my new favorite
baselayer. The Butter Man is offered in a non-hooded version for men and goes
by the name of ‘Butter Zippit Hoody’ for women.
Price: $80
Weight: 12 oz.
Sizes: S, M, L, XL, XXL
Subscribe to:
Posts (Atom)